

As a seasoned supplier of Shape Moulding Machines, I've witnessed firsthand the importance of efficient mould replacement. Whether you're dealing with an ICF Mould With ETPU Shape Mould Machine, an Eps Shape Molding Machine, or an Eps Box Shape Moulding Machine, knowing how to replace a mould is a crucial skill that can save time, reduce downtime, and improve overall productivity. In this blog post, I'll share a step-by-step guide on how to replace a mould on a Shape Moulding Machine, along with some tips and best practices to ensure a smooth and successful process.
Step 1: Preparation
Before you begin the mould replacement process, it's essential to take the necessary precautions to ensure your safety and the safety of those around you. Here are some key steps to follow:

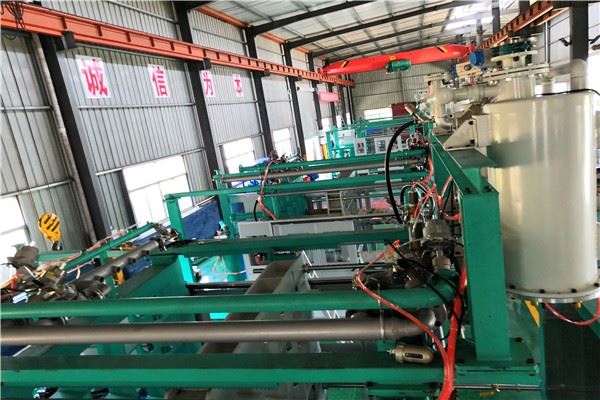
- Turn off the machine: Make sure the Shape Moulding Machine is completely powered off and disconnected from the electrical supply. This will prevent any accidental startup during the mould replacement process.
- Wear appropriate safety gear: Put on safety glasses, gloves, and any other protective equipment recommended by the machine manufacturer. This will help protect you from potential hazards such as sharp edges, hot surfaces, and flying debris.
- Gather the necessary tools: Collect all the tools you'll need for the mould replacement, such as wrenches, screwdrivers, and lifting equipment. Having the right tools on hand will make the process more efficient and less frustrating.
- Clean the work area: Clear the area around the machine of any clutter, debris, or obstacles. This will provide you with a clean and safe workspace to work in.
Step 2: Remove the Old Mould
Once you've completed the preparation steps, it's time to remove the old mould from the Shape Moulding Machine. Here's how:
- Locate the mould mounting bolts: Identify the bolts or fasteners that hold the old mould in place on the machine. These bolts are typically located around the perimeter of the mould or on the sides of the machine.
- Loosen the mounting bolts: Use the appropriate wrench or tool to loosen the mounting bolts. Be careful not to remove the bolts completely at this stage, as you'll need to keep the mould in place while you remove any remaining connections.
- Disconnect any hoses or cables: If the old mould is connected to any hoses, cables, or other components, carefully disconnect them. Make sure to label the connections or take photos to ensure you can reconnect them correctly later.
- Remove the mounting bolts: Once all the connections have been disconnected, remove the remaining mounting bolts and carefully lift the old mould out of the machine. Use a lifting device or assistance if the mould is heavy or awkward to handle.
Step 3: Inspect the Machine and Mould
After removing the old mould, it's a good idea to inspect the machine and the new mould to ensure they are in good condition and ready for use. Here's what to look for:
- Check the machine for damage: Inspect the machine for any signs of damage, such as cracks, dents, or wear. If you notice any damage, contact the machine manufacturer or a qualified technician for repairs.
- Inspect the new mould: Examine the new mould for any defects, such as scratches, chips, or misalignments. Make sure the mould is the correct size and shape for your machine and that it is compatible with the materials you'll be using.
- Clean the machine and mould: Use a clean, dry cloth to wipe down the machine and the new mould to remove any dust, dirt, or debris. This will help ensure a proper fit and prevent any contaminants from affecting the moulding process.
Step 4: Install the New Mould
Once you've inspected the machine and the new mould, it's time to install the new mould. Here's how:
- Position the new mould: Carefully lower the new mould into the machine, aligning it with the mounting holes and any other reference points. Make sure the mould is centered and level before proceeding.
- Secure the mounting bolts: Insert the mounting bolts through the holes in the mould and the machine, and tighten them using the appropriate wrench or tool. Make sure the bolts are tightened securely, but not over-tightened, as this can damage the mould or the machine.
- Reconnect any hoses or cables: Reconnect any hoses, cables, or other components that were disconnected when removing the old mould. Make sure the connections are tight and secure, and that they are properly labeled or aligned with the corresponding ports on the machine and the mould.
- Check the alignment: Once the new mould is installed and all the connections have been reconnected, check the alignment of the mould using a straightedge or other alignment tool. Make any necessary adjustments to ensure the mould is properly aligned and centered.
Step 5: Testing and Calibration
After installing the new mould, it's important to test the machine and calibrate it to ensure it is operating correctly. Here's what to do:
- Power on the machine: Reconnect the electrical supply to the Shape Moulding Machine and turn it on. Follow the machine manufacturer's instructions for starting up the machine and allowing it to warm up.
- Run a test cycle: Start a test cycle on the machine using a small amount of material. Observe the machine's operation and the quality of the moulded parts. Look for any signs of problems, such as uneven filling, flashing, or misalignment.
- Make any necessary adjustments: If you notice any issues during the test cycle, make the necessary adjustments to the machine settings, such as temperature, pressure, or cycle time. Consult the machine manufacturer's manual or a qualified technician for guidance on how to make these adjustments.
- Calibrate the machine: Once the test cycle is complete and the moulded parts are of acceptable quality, calibrate the machine to ensure consistent and accurate results. This may involve adjusting the machine's sensors, controls, or other settings.
Tips and Best Practices
Here are some additional tips and best practices to keep in mind when replacing a mould on a Shape Moulding Machine:
- Follow the manufacturer's instructions: Always refer to the machine manufacturer's manual for specific instructions on how to replace a mould on your particular model of Shape Moulding Machine. The manual will provide you with detailed information and safety guidelines that are specific to your machine.
- Keep a record of the mould replacement: Maintain a log or record of each mould replacement, including the date, time, and any relevant details about the process. This will help you track the performance of the machine and the moulds over time and identify any potential issues or trends.
- Inspect the mould regularly: Regularly inspect the mould for signs of wear, damage, or other issues. This will help you identify any problems early on and take the necessary steps to prevent them from affecting the quality of the moulded parts or the performance of the machine.
- Train your operators: Make sure your operators are properly trained on how to replace a mould on the Shape Moulding Machine. Provide them with the necessary training and resources to ensure they can perform the task safely and efficiently.
- Use high-quality moulds: Invest in high-quality moulds that are designed for your specific application and the materials you'll be using. High-quality moulds will last longer, produce better-quality parts, and require less maintenance and replacement.
Conclusion
Replacing a mould on a Shape Moulding Machine is a critical task that requires careful preparation, attention to detail, and the use of the right tools and techniques. By following the step-by-step guide outlined in this blog post and implementing the tips and best practices, you can ensure a smooth and successful mould replacement process that minimizes downtime and maximizes productivity. If you have any questions or need further assistance with mould replacement or any other aspect of Shape Moulding Machine operation, please don't hesitate to contact us. We're here to help you get the most out of your Shape Moulding Machine and achieve your production goals.
If you're in the market for a new Shape Moulding Machine or need to replace your existing moulds, we'd love to hear from you. Our team of experts can help you find the right machine and moulds for your specific needs and provide you with the support and guidance you need to ensure a successful investment. Contact us today to learn more and start the conversation.
References
- Shape Moulding Machine Manufacturer's Manual
- Industry Best Practices for Mould Replacement on Shape Moulding Machines